So.... do you LOVE it?!?! I am in LOVE with my new blog design!! I am so impressed with the quick turn around, professionalism, and the creativeness of Megan at
A Bird in Hand Designs. Thank you so much, Megan!!
Yesterday, I shared with you our plans for creating this adorable
Abraham Lincoln writing craft! I thought I'd share with you how I manage to complete these large projects with all 29 of my kids at the same time with no outside assistance. First, I do not have my K kids trace the parts or cut them out when there are multiple pieces. To be honest, I have too many students in my class to have time for that- it would take us an entire day for just one project! I just trace and cut out the parts beforehand and have them ready to go. I lay each part on my desk in the order they will need to assemble their craft. I put a post-it note above each piece.
.png)
One table at a time, they can gather their materials and get started at their own pace. On the board, I have the craft assembled in steps with the post-it notes on each piece to identify how to assemble the craft. I do not have to worry about giving a detailed explanation of how to assemble the craft, and lets face it- half the time we repeat ourselves 100 times anyway ;) So, I opt to save my breath and give the visual cues they can rely on and really need for help! This makes the project completely student led, and I rarely ever have to answer a question on how to assemble the craft at all.
.png)
While the students are working at their own pace to assemble, I can pull students over to work on the writing piece. If a student is an "early finisher", they simply check in for a Daily 5 choice until everyone is finished. In managing craft projects this way, it takes a little prep time- but is such a valuable time and stress saver during class! How do you manage a large craft project in your class? I'd love to hear your tips and tricks!
Do you use reading windows? I'd love to share with you a simple, quick, and super-cheap way to create windows at just the size you need!
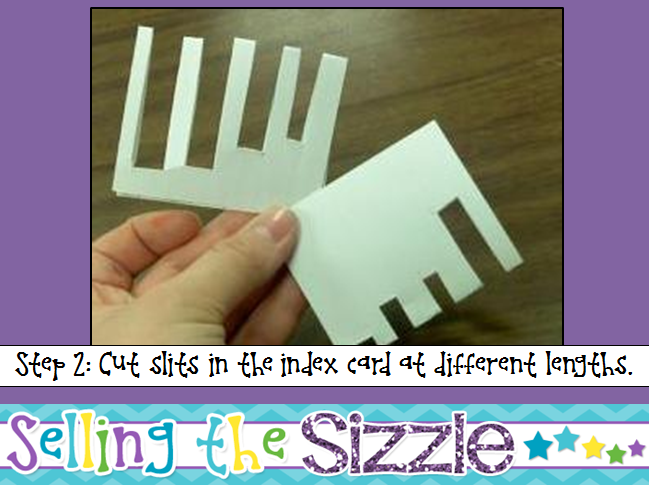
Step 1: Fold an index card in half.
Step 2: Cut slits in the card a different lengths. You can customize these to the text you are using by laying the card on top of a page in a book. This eliminates having to buy different size windows or a window not being the right size for a word or phrase.
Step 3: Use a highlighter to accent the windows.
Step 4: Use the window to highlight words, phrases, or even whole sentences! I used these with one of my tutoring kiddos after school yesterday and it was so helpful to isolate a word, then escalate to a phrase, and then compile the whole sentence- all with one little index card! :)


No comments:
Post a Comment